Absence Codes are all the different reasons why your employee’s might not be attending work on a given day i.e. annual leave, sickness, etc. You must define these codes before you can book time off for your employee’s against them.
To create an Absence Code, on the top menu go to Configuration – Absence Codes (Fig 1).

Fig 1
A screen will load showing all the Absence Codes currently setup in your system. It will also show the Anomaly Codes for things such as Late Arrival and Early Departure (Fig 2).
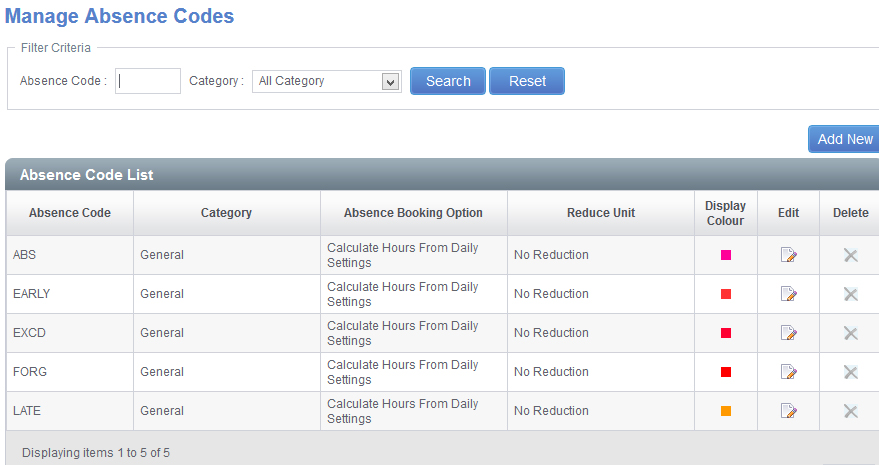
Fig 2
Click Add New.
The Manage Absence Code screen will load (Fig 3).
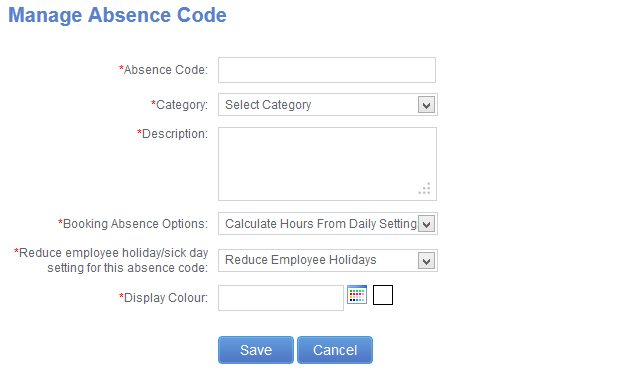
Fig 3
All sections marked with a * must be completed.In the Absence Code box you can enter a short code for this Absence Type to make it easy to identify when looking at the Employee Timesheet.
Under Category you can set which Category the hours calculated for this Absence Type are shown against. This could be your Normal time Category or some other Category you have defined previously.
In the Description box you can enter a full description for this Absence Code.
In Booking Absence Options you can specify how the system calculates the number of hours an employee receives when they are booked on this Absence Code. There are two options:
- Use Hours For Booking – A box then loads allowing you to enter the number of hours to give for this Absence Code. This is a fixed value and will be the same for all employees regardless of their scheduled hours.
- Calculate Hours From Daily Settings – The system will calculated how many hours the employee earns for this Absence Code based on their expected hours for the day. It is possible to book half days and full days under this setting as well as manually enter a number of ours when booking the absence.
In the Reduce employee holiday/sick day setting for this absence code option you can set if this Absence Code reduces their holiday entitlement, sick entitlement or makes no reductions at all.
The last option is to select a colour for this Absence Code, this colour will show on the Schedule Planner screen allowing you to easily distinguish between the different Absences booked when looking at that screen.
Once you have set this information click Save.