The Leave Planner allows you to view the instances of holiday and sickness for your employees over a date range. You can also add and remove instances of leave from the screen.
To access the Leave Planner Select Leave – Leave Planner (Fig 1).

Fig 1
The Leave Planner screen will load (Fig 2).
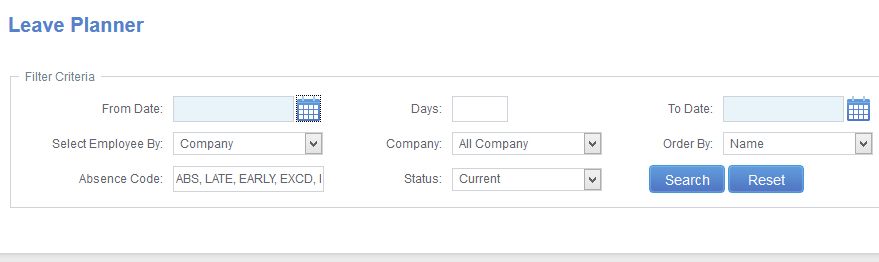
Fig 2
Using the calendar icons set the From Date and To Date to the date range you wish to see leave over. You can filter the screen to only show a specific Department or Company using the Select Employee By section.
Once you these are set click Search.
The screen will refresh to show the Leave Planner for the selected period.
On the Scheduled Planner screen locate the employee who is taking leave. Once you have located the employee, locate the booking to be amended. Right click on the booking and a menu will load (Fig 3).
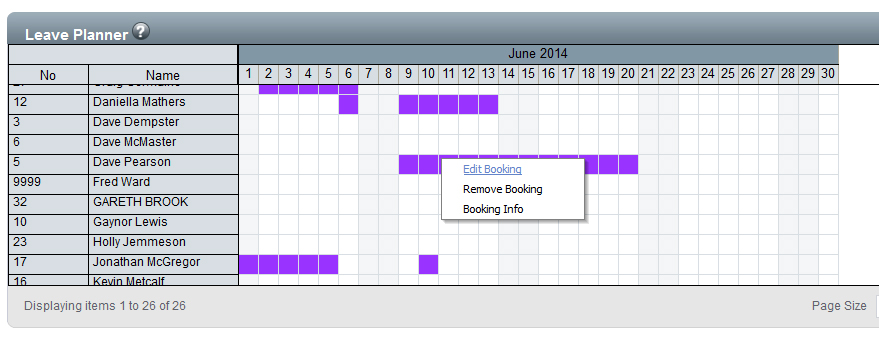
Fig 3
Days where leave has been booked will show in the colour assigned for that leave type. Saturdays and Sundays will show in a light grey colour.
From the menu select Edit Booking.
The Manage Absence screen will load (Fig 4).
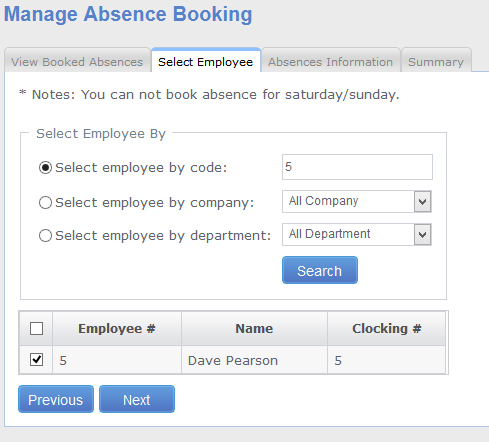
Fig 4
The first screen will show the employee the leave was booked for. Click Next.

Fig 5
The settings for this absence will then be shown. Amend these as needed. Then click Next.
A Summary screen will then load (Fig 6).
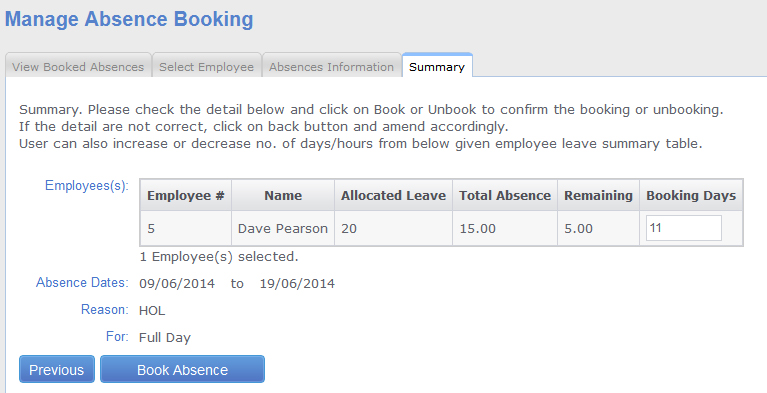
Fig 6
Make any changes you need on this screen and the Book Absence save the changes.