Pressing the menu key will initiate the administrator verification process. Anybody who is setup as an administrator can now log in. If you haven’t set any additional administrators up simply type in the user ID 7856 and press OK, when prompted enter the password 7856. If the verification is successful, the terminal will allow access to the menu.
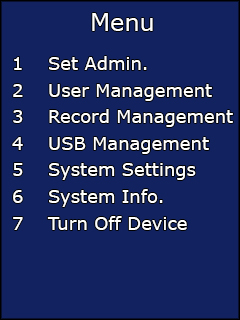
Fig 1
Enter the menu as above and select Option 2 – User Management.
Select Option 1 – Set User and type in the employee’s ID number (This should be the same number used for the Card Number in your software) and press OK.
Type in the employee name, this is done by selecting the desired letter followed by the OK key to move on to the next letter. When finished press OK again to save.
Select Option 1 – Face.
The user should adjust their position so they can see their eyes in the mirror and follow the on screen instructions.
- When enrolling, users should stand between 30cm and 80cm from the unit and be able to see their eyes in the mirror.
- Users should have a normal facial expression.
- Users must not wear sunglasses.
When the terminal has saved the image, the final stage is to select Option 2 – Attendance on the ‘User Privilege’ screen.